There are two ways to update or create a roster for a teacher from the Admin account.
- Logging into a teacher's account to create or update a teacher's roster.
- Using the Manage link to update a teacher's roster.
Option 1 - Logging into a teacher's account to create or update a teacher's roster.
To log into a teacher's account through your Admin login, click on the Site Admin tab and then select "Users." Once on the Users page, find the teacher you wish to update and click the "Key" link on the right of the page.

Once you are logged into the teacher's account, you can make the necessary changes.
If you are not familiar with the teacher interface - Click Here. This link will take you to a page with instructions on adding classes and students.
Option 2 - Using the Manage link to update a teacher's roster.
*Please ensure that the teacher has created a class before using this process. If this is a new teacher account, log into the teacher's account and create a class for them. Once the class is created, you can proceed with adding students.
- Click "Manage" on the top right of the page.
- Select Student Roster.
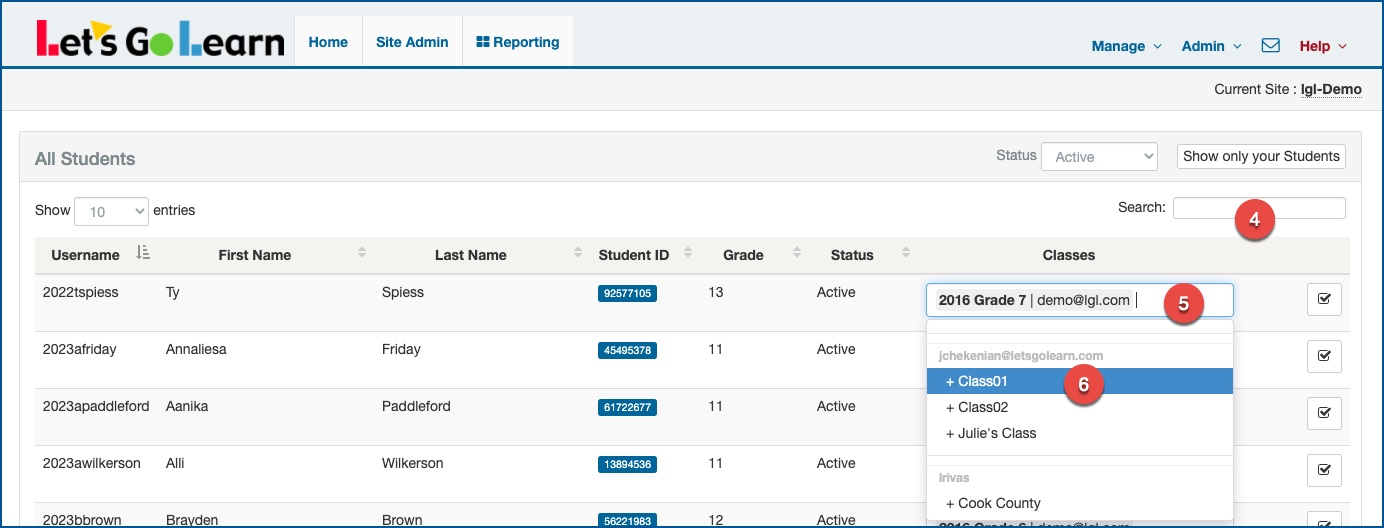
- Click on "Show all Students" to access the All Student Roster.

4. In the Search field, type in the student's ID or name.
5. Once you find the student you wish to add to a teacher's roster, click in the box under the "Classes" column.
If there is already a class listed, be sure to click to the right of the class name in the blank area.
6. Scroll through the pull-down tab until you find the teacher account and class you wish to populate. Click on that class name.
7. If you need to remove a student from a class, simply click on the class name in the box and use the delete or backspace
button on your keyboard
The student will now show up on the teacher's Class page.


 Profile
 Sign up now
 Manage
  Sign out