The Manage tab lets you manage your students and rosters from one tab. The following functions are available on the Manage tab:

Student Roster
If you need to create a new class, for instructions - Click Here
- Click on the "Manage" link on the top right of the page.
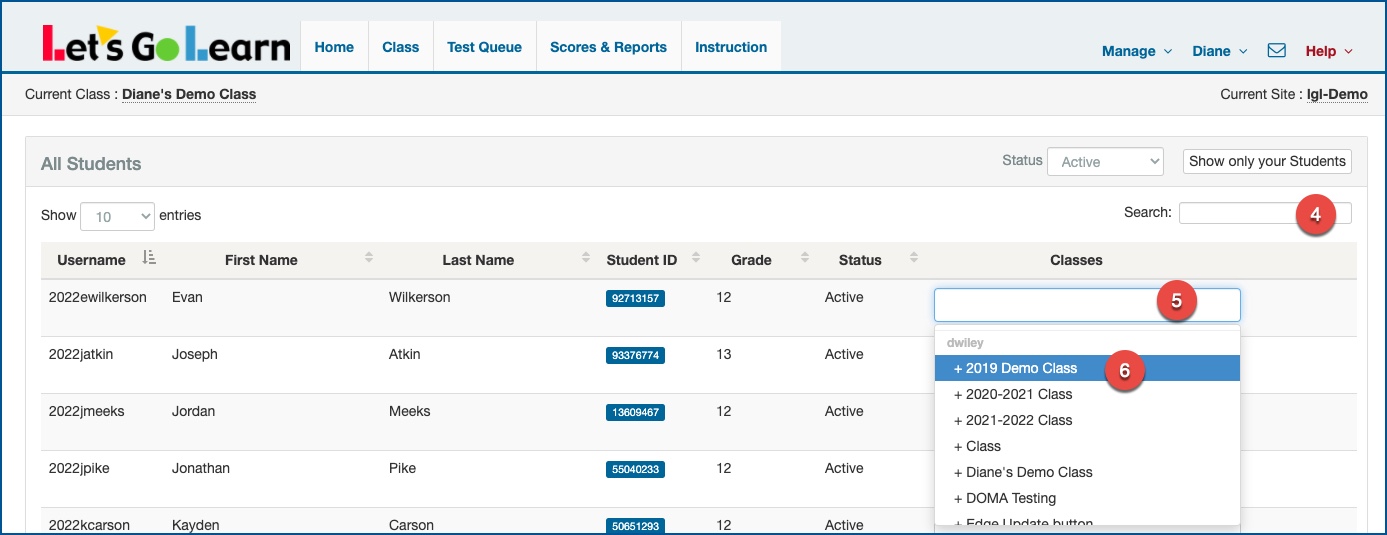
- Select "Student Roster".
- Click on "Show all Students".
- In the Search field, use the student's ID or name to find student.
- Once you find the student you wish to add to a teacher's roster, click in the box under the "Classes" column. If there is already a class(es) listed, be sure to click to the right of the class name in the blank area to add the additional class.
- On the pull down tab, scroll until you find the class you wish to populate the student. Click on that class name.
The student will now show up on your Class page.

Add Student
New Student Information Requirements
Here's a breakdown of the information you'll need when adding new students to Let's Go Learn:
Required:
- First Name/Last Name: Every student needs a full name for easy identification.
- Date of Birth
- Grade: Select the student's current grade level.
- Username: Each student needs a unique username to access Let's Go Learn.
- Password: Students need a password to log in, but it doesn't have to be unique for each student.
Highly Recommended:
- School's Student ID: While not mandatory, including a unique student ID from your school system helps with record-keeping and organization.
- Student Email: This is an optional field. It is used for password reset.
View Classes
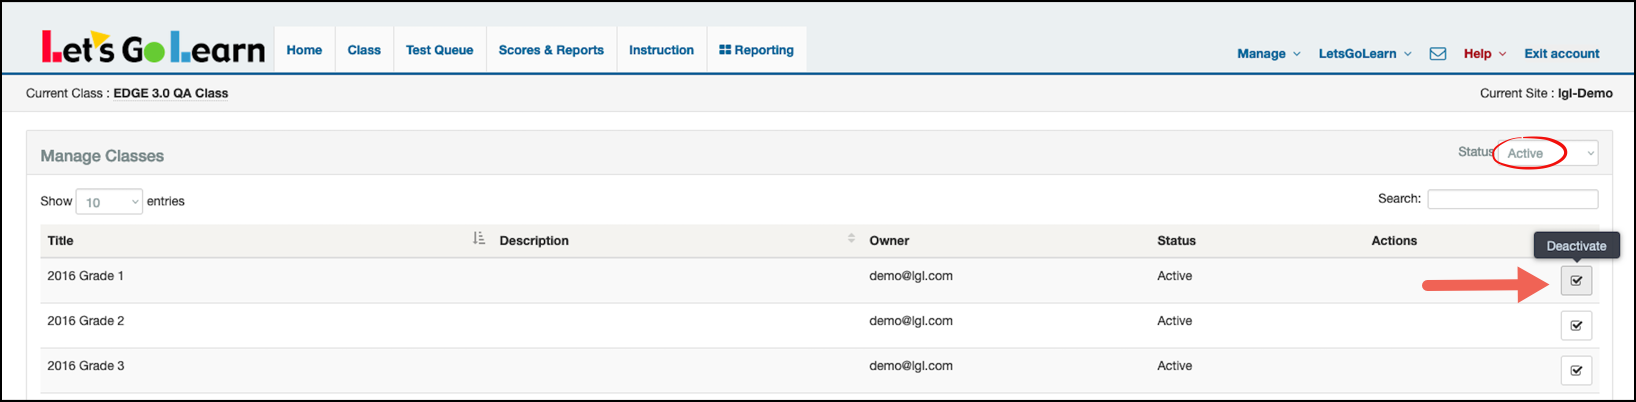
On the "Active" Classes status page, you can deactivate any class by clicking on the checked box on the right of the page.
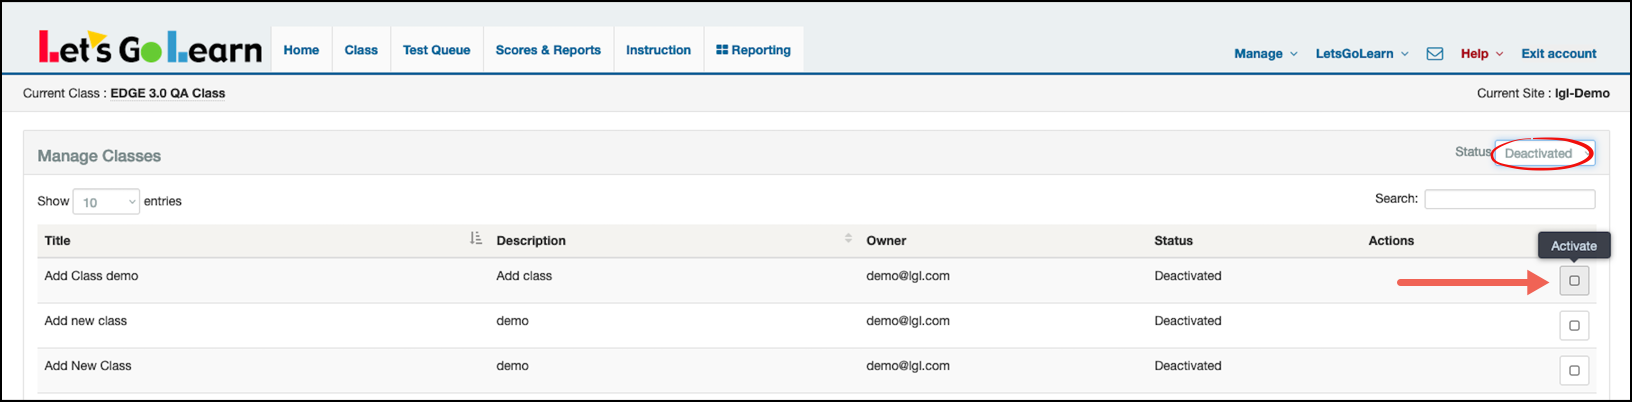
To reactivate any closed classes, change to the "Deactivated" status page and click "Activate" on the class you wish to re-open.
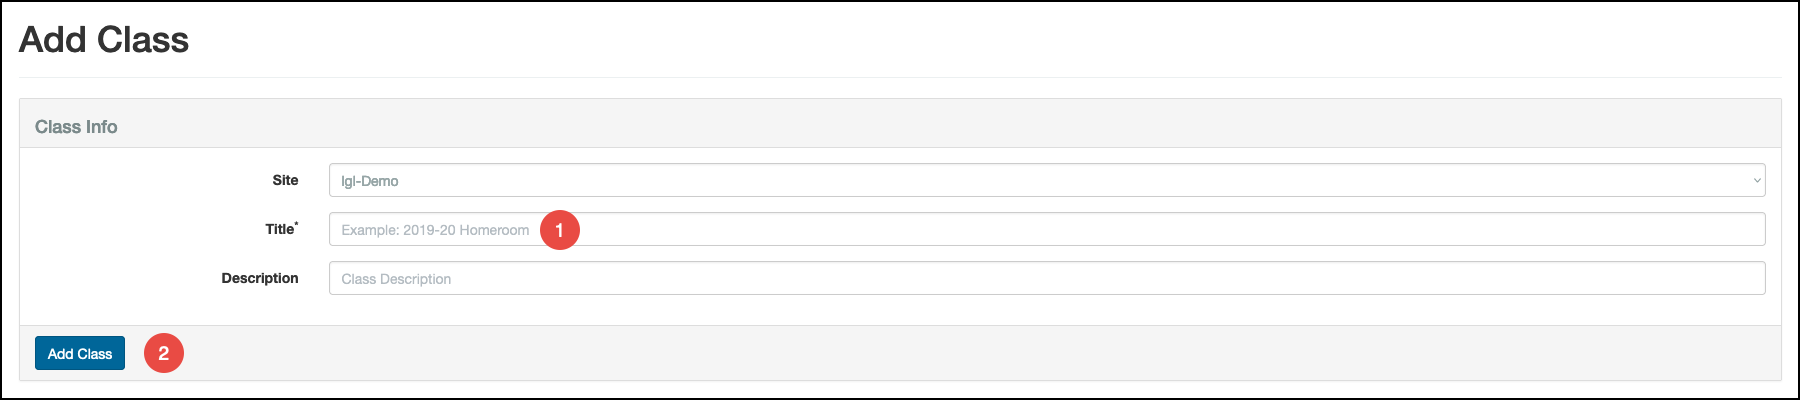
Add Class
- Title* - Name your class
- Add Class
*Class Description is optional


 Profile
 Sign up now
 Manage
  Sign out